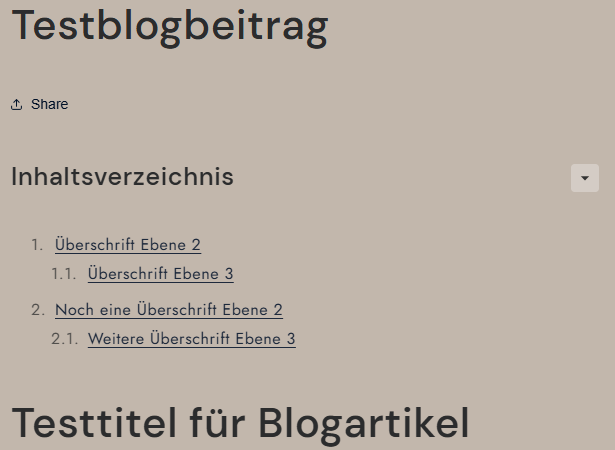
Im folgenden Beitrag zeige ich wie man ganz einfach und ohne Geld auszugeben ein Inhaltsverzeichnis in einen Shopify Store einfügt.
In unserem Beispiel nutzen wir den kostenloses Trade Theme, diese Anleitung ist aber auch für andere Themes nutzbar.

Als erstest passen wir unseren HTML Code an, um das Inhaltesverzeichnis einzufügen.
Die passende Datei für Blogbeiträge finden wir unter sections/main-article.liquid. Hier suchen wir uns diese Stelle im Code:
  {%- when 'content' -%}
    <div
      class="article-template__content page-width page-width--narrow rte{% if settings.animations_reveal_on_scroll %} scroll-trigger animate--slide-in{% endif %}"
      {{ block.shopify_attributes }}
    >
  {%- when 'content' -%}
    <div
      class="article-template__content page-width page-width--narrow rte{% if settings.animations_reveal_on_scroll %} scroll-trigger animate--slide-in{% endif %}"
      {{ block.shopify_attributes }}
    >
und ändere es wie folgt:
      {%- when 'content' -%}
        <div
          class="article-template__content page-width page-width--narrow rte{% if settings.animations_reveal_on_scroll %} scroll-trigger animate--slide-in{% endif %}"
          {{ block.shopify_attributes }}
        >
          <nav class="toc" id="toc-container">
            <div class="toc-header">
              <h2 class="toc-title">Inhaltsverzeichnis</h2>
                <button type="button"
                  class="toc-toggle"
                  aria-expanded="true"
                  aria-controls="toc-list">
                  <svg xmlns="http://www.w3.org/2000/svg" width="20" height="20" fill="currentColor" viewBox="0 0 24 24">
                    <path d="M7 10l5 5 5-5H7z"/>
                  </svg>
                </button>
            </div>
            <div class="toc-content" id="toc-list">
              <!-- Wird per JavaScript gefüllt -->
            </div>
          </nav>
          <div class="article-content-wrapper">
            {{ article.content }}
          </div>

        </div>
Wir erstellen eine Datei unter assets/toc.js Welche automatisch für uns das Inhaltsverzeichnis aufbaut und Alle Überschriften von h1 bis h3 scannt um uns ein Inhaltsverzeichnis zu bauen.
document.addEventListener("DOMContentLoaded", function () {
  var content = document.querySelector('.article-content-wrapper');
  if (!content) return;

  var headings = content.querySelectorAll('h2, h3');
  if (headings.length === 0) return;

  var listHtml = '<ol>';
  var openSublist = false;

  headings.forEach(function (heading, index) {
    var id = heading.id;
    if (!id) {
      id = 'heading-' + index;
      heading.id = id;
    }

    if (heading.tagName.toLowerCase() === 'h2') {
      if (openSublist) {
        listHtml += '</ol></li>';
        openSublist = false;
      }
      listHtml += '<li class="toc-h2"><a href="#' + id + '">' + heading.textContent + '</a>';
    } else if (heading.tagName.toLowerCase() === 'h3') {
      if (!openSublist) {
        listHtml += '<ol>';
        openSublist = true;
      }
      listHtml += '<li class="toc-h3"><a href="#' + id + '">' + heading.textContent + '</a></li>';
    }
  });

  if (openSublist) {
    listHtml += '</ol></li>';
  } else {
    listHtml += '</li>';
  }

  listHtml += '</ol>';

  var tocListContainer = document.querySelector('.toc-content');
  if (tocListContainer) {
    tocListContainer.innerHTML = listHtml;
  }

  var toggleBtn = document.querySelector(".toc-toggle");
  var tocContent = document.querySelector(".toc-content");

  if (toggleBtn && tocContent) {
    toggleBtn.addEventListener("click", function () {
      var expanded = toggleBtn.getAttribute("aria-expanded") === "true";
      toggleBtn.setAttribute("aria-expanded", !expanded);
      tocContent.classList.toggle("is-collapsed");
    });
  }
});
Im nächsten Schritt erstellen wir CSS, dazu suchen wir uns die Base CSS Datei unter assets/base.css und fügen am ENde aber vor @keyframes folgendes ein:
/* DATUM ANFANG TOC: Einrückung für h3-Überschriften im Inhaltsverzeichnis */
.toc ol {
  counter-reset: item;
}

.toc li {
  display: block;
  position: relative;
  margin-bottom: 0.5em;
}

.toc li.toc-h3 {
  padding-left: 0.8em;
}

.toc li::before {
  counter-increment: item;
  content: counters(item, ".") ". ";
  position: absolute;
  width: 0em;
  text-align: right;
  left: 0;
}

.toc a {
  display: inline-block;
  padding-left: 1.5em;
  word-break: break-word;
}

.toc-header {
  display: flex;
  justify-content: space-between;
  align-items: center;
  margin-bottom: 1em;
}

.toc-content.is-collapsed {
  display: none;
}

.toc-toggle {
  background: rgba(255, 255, 255, 0.2);
  border: none;
  backdrop-filter: blur(5px);
  border-radius: 4px;
  padding: 4px;
  cursor: pointer;
  display: flex;
  align-items: center;
  justify-content: center;
  transition: background 0.3s ease;
}

.toc-toggle:hover {
  background: rgba(255, 255, 255, 0.3);
}

.toc-toggle svg {
  width: 20px;
  height: 20px;
  color: #333;
}

html {
  scroll-padding-top: 60px;
}
/* ENDE TOC: Einrückung für h3-Überschriften im Inhaltsverzeichnis */